Git Basics: Clone, Add, Commit, Fetch, and Push
This tutorial will guide you through the basic Git operations: cloning a repository, making changes, adding and committing those changes, fetching updates, and pushing your changes back to GitHub.
Prerequisites
Before you begin, make sure you have:
- A GitHub account
- A repository on GitHub (follow our Create a Repository tutorial if needed)
- Git installed on your computer (download from git-scm.com)
- A text editor or IDE of your choice
Step 1: Clone the Repository
Cloning creates a local copy of your repository on your computer.
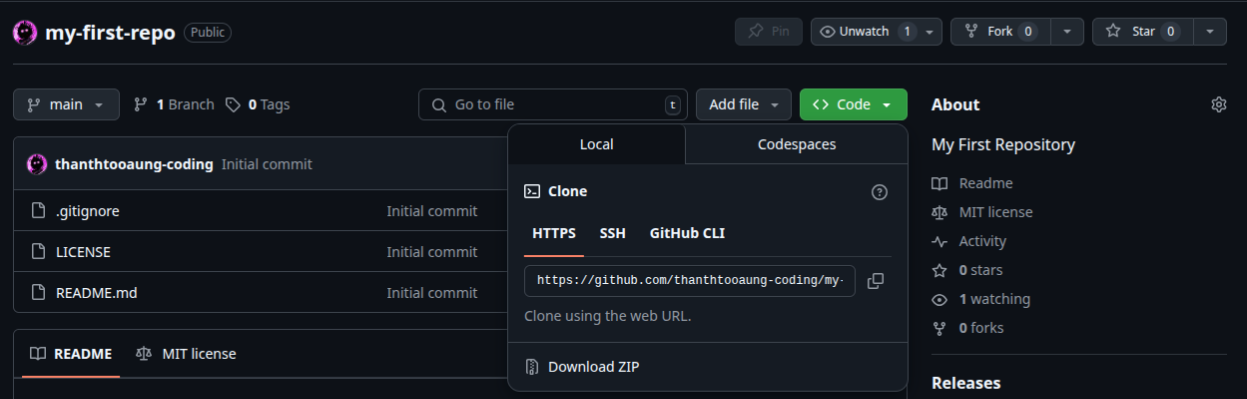
Step 1.1: Get the repository URL
Navigate to your repository on GitHub and click the green "Code" button. Copy the HTTPS or SSH URL.
Step 1.2: Open your terminal
Open your terminal (macOS/Linux) or command prompt (Windows). Navigate to the directory where you want to clone the repository.
cd ~/Documents/GitHubStep 1.3: Clone the repository
Run the git clone command followed by the repository URL you copied.
git clone https://github.com/yourusername/your-repository.git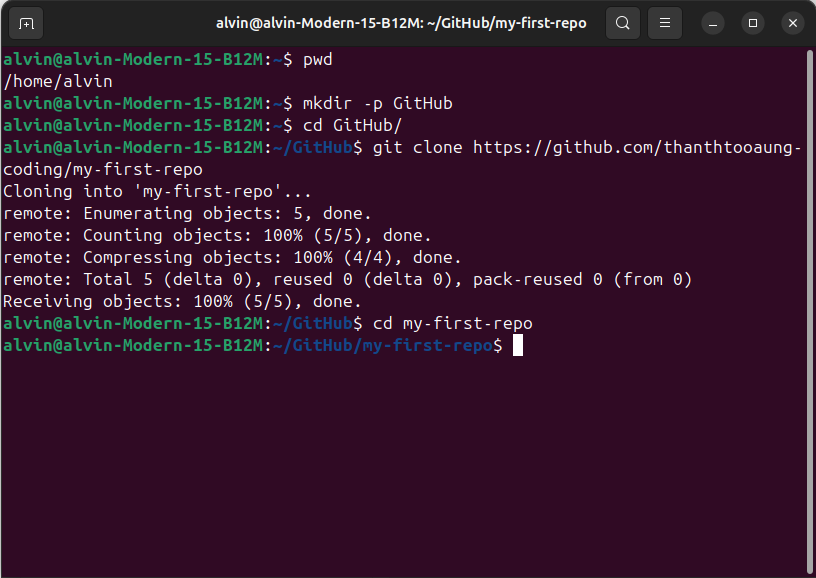
Step 1.4: Navigate into the cloned repository
After cloning is complete, navigate into the repository directory.
cd your-repositoryStep 2: Make Changes to Your Files
Now that you have a local copy of your repository, let's make some changes.
Step 2.1: Open the repository in your text editor
Open the repository folder in your preferred text editor or IDE.
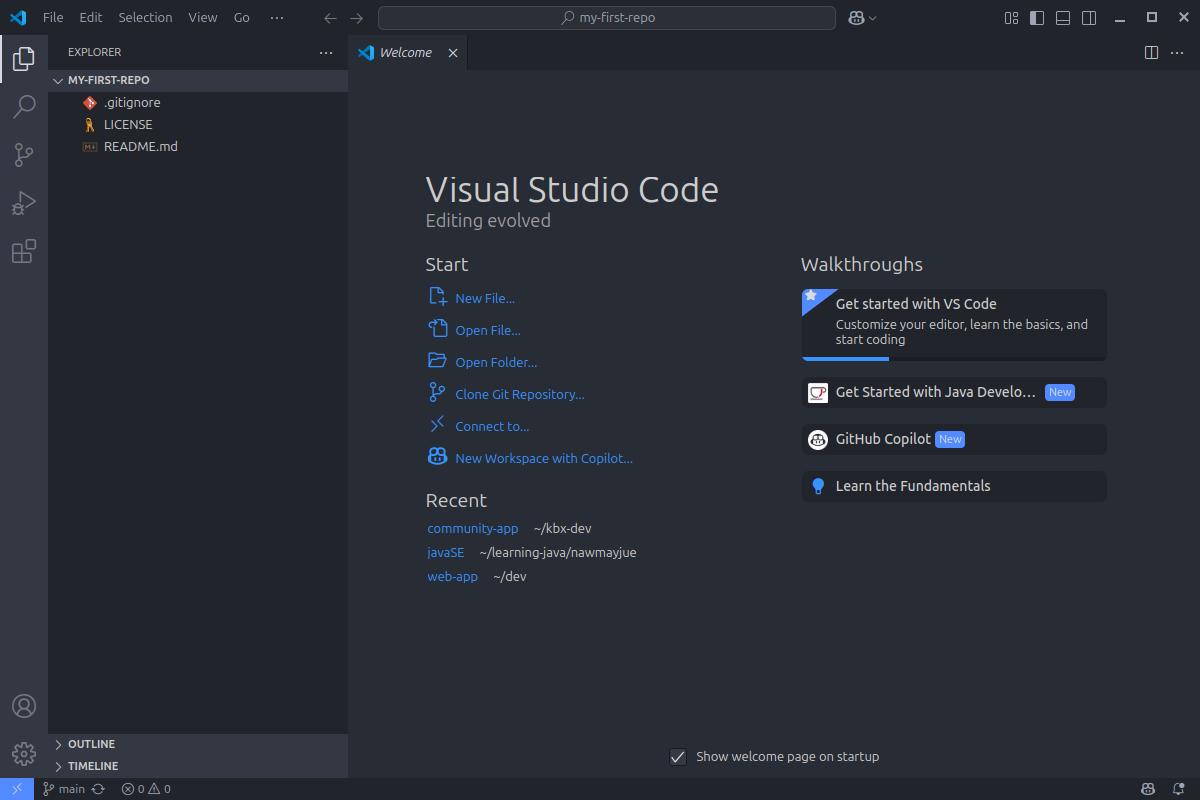
Step 2.2: Modify an existing file or create a new file
Let's modify the README.md file or create a new file in your repository.
# my-first-repo

My First Repository

# This is the repository for my GitHub tutorial.
After making changes, save the file(s).
Step 3: Add and Commit Changes
Now that you've made changes, you need to add them to the staging area and commit them to your local repository.
Step 3.1: Check the status of your changes
Run the git status command to see which files have been modified.
git status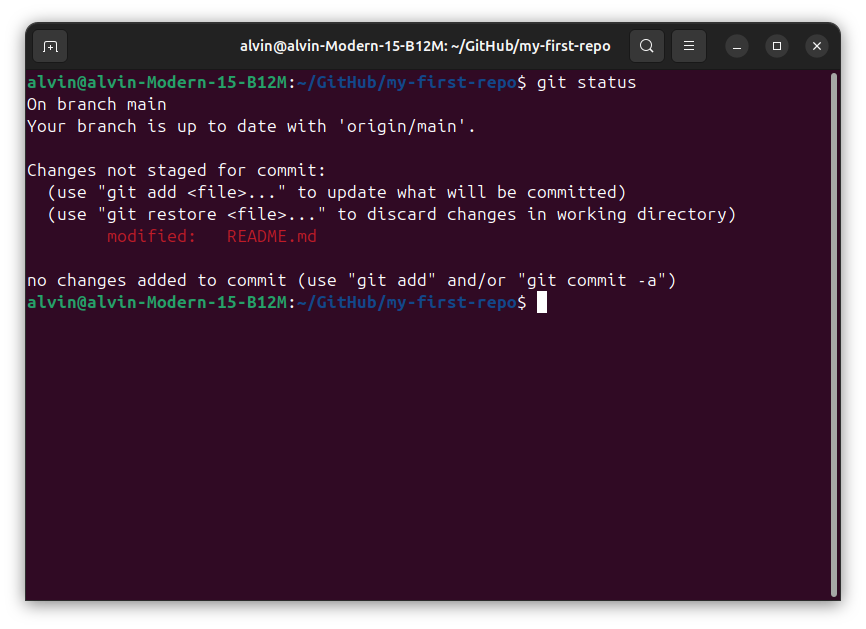
Step 3.2: Add files to the staging area
Use the git add command to add your changes to the staging area. You can add specific files or all changed files.
Add a specific file:
git add README.mdOr add all changes:
git add .Step 3.3: Verify files are staged
Run git status again to verify that your files are staged for commit.
git statusStep 3.3: Commit your changes
Use the git commit command to commit your staged changes with a descriptive message.
git commit -m "Update README with project description"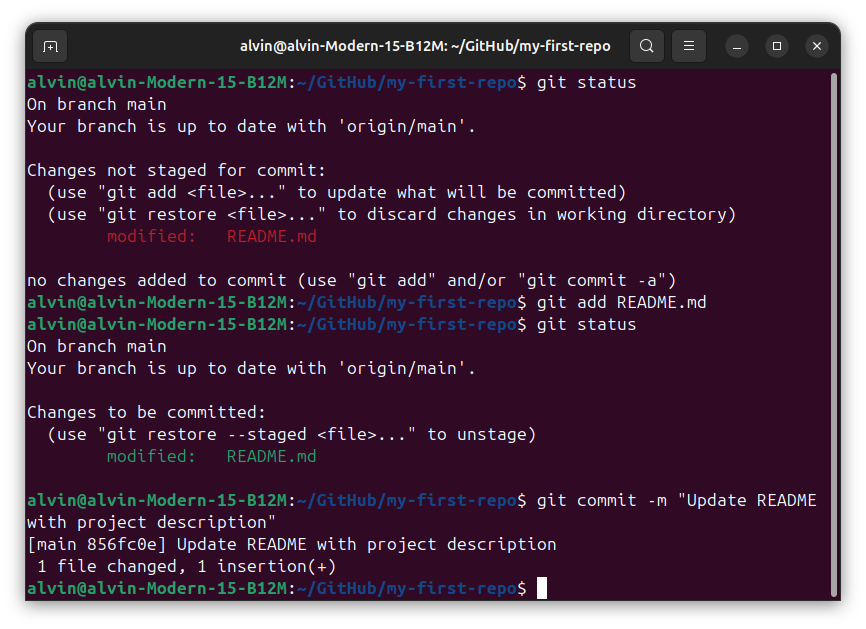
The commit message should be clear and describe what changes you made.
Step 4: Fetch and Pull Updates
Before pushing your changes, it's good practice to fetch and pull any updates from the remote repository.
Step 4.1: Fetch changes from the remote repository
The git fetch command downloads changes from the remote repository but doesn't integrate them into your working files.
git fetch originStep 4.2: Pull changes from the remote repository
The git pull command fetches changes from the remote repository and integrates them into your local branch.
git pull origin main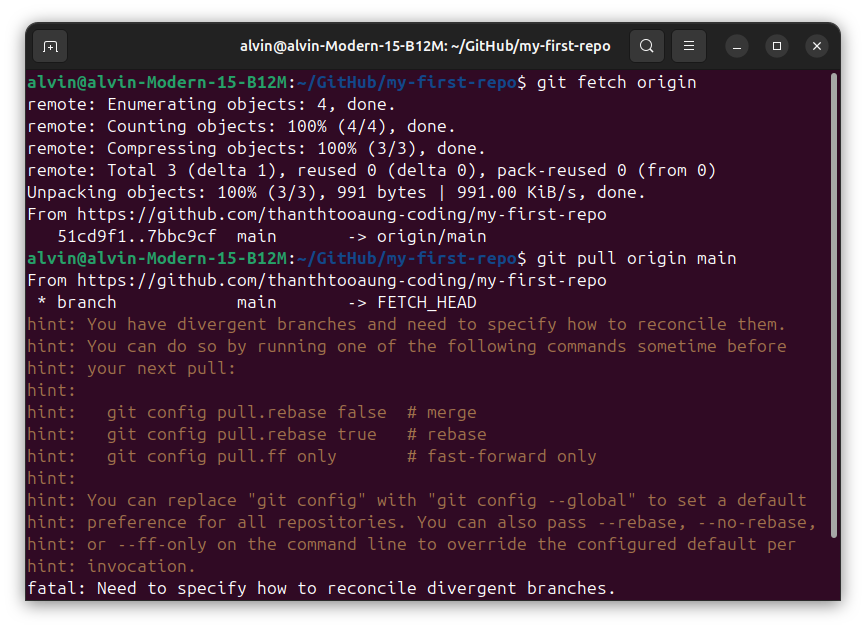
Note: Handling Merge Conflicts
If you get an error about "Merge (Safe & Common for Beginners)", you can use the following alternative:
git pull --no-rebase origin mainOr permanently set the behavior for all future pulls in this repository:
git config pull.rebase false(Or use --global to apply it to all repositories.)
Step 5: Push Changes
Now that you've committed your changes locally and pulled any remote changes, it's time to push your changes to GitHub.
Step 5.1: Push your changes to GitHub
Use the git push command to upload your local commits to the remote repository.
git push origin main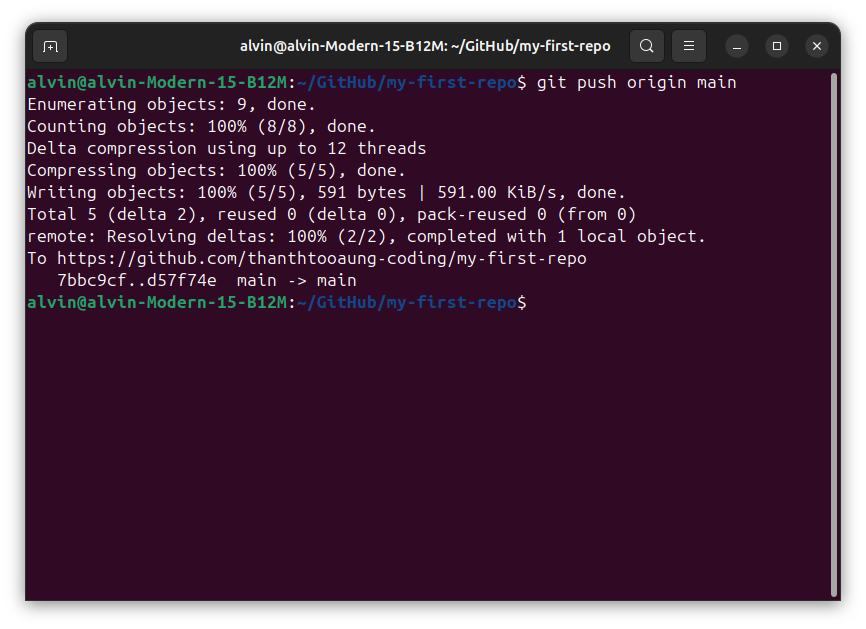
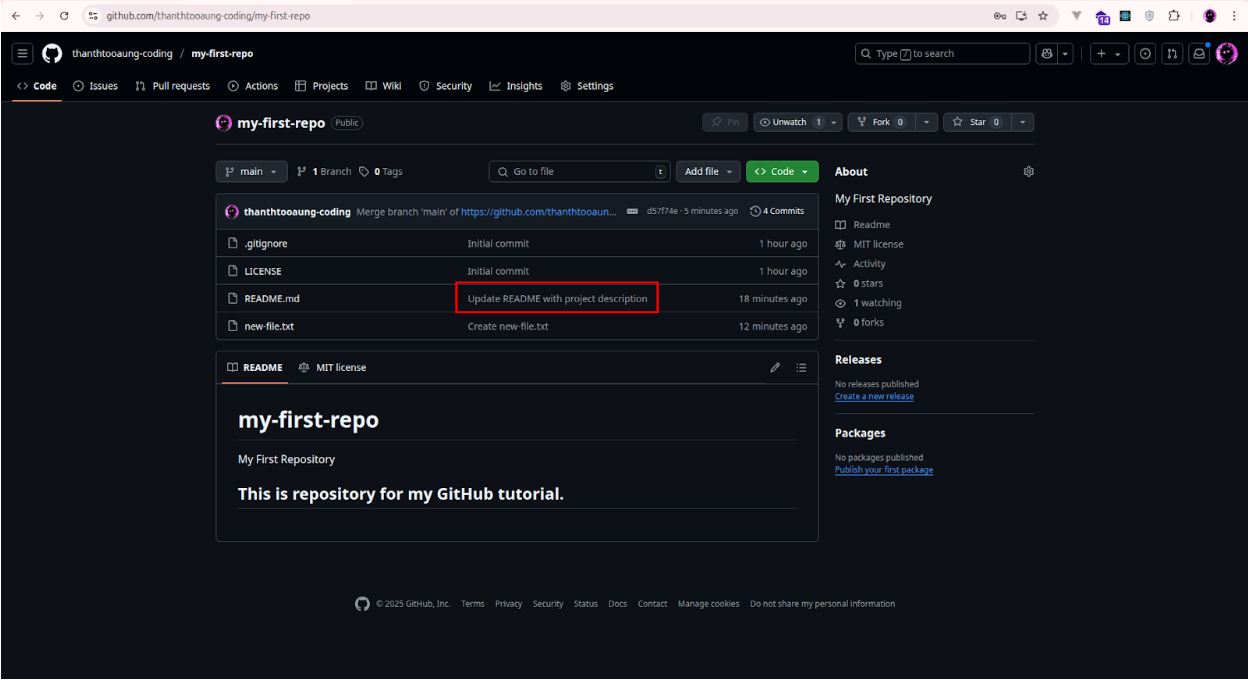
Step 5.2: Verify your changes on GitHub
Navigate to your repository on GitHub and verify that your changes have been pushed successfully.
Next Steps
Congratulations! You've successfully cloned a repository, made changes, committed them, and pushed them back to GitHub. Here are some next steps to continue your Git journey:
Pro Tip
Create a .gitignore file in your repository to specify files and directories that Git should ignore. This is useful for excluding build artifacts, dependency directories, and sensitive information.